Setting up Jekyll, SCSS/Sass, and TailwindCSS on Github Pages
Here’s how to set up a new blank Jekyll-powered site with Tailwind CSS and SCSS/Sass support on Github Pages, current as of July 28, 2022, sourcing from various guides and other forums. The site will be a complete blank slate - no preset theme - so you can style it however you wish.
This site is powered by the same setup. Due to Tailwind CSS moving to a new engine in December 20211, many guides regarding this setup are somewhat obsolete. Mehdi H’s guide proved the most straightforward and current of the guides I found, but it was written before the release of Tailwind v3, and as such I had to chase down the miscellaneous errors that popped up during my setup. My hope is that the several days of headaches and frustration I encountered during this setup spares anyone else from the same fate :)
Step 1: Set up Jekyll and plugins
Mehdi H wrote an excellent guide on the initial setup2, and it’s the basis of my own setup. So I’m not going to copy-paste their hard work here. They deserve credit.
Follow Step 1 on Mehdi’s guid, up until the part where you add Tailwind stylesheets to main.scss. Then come back here. This is where things start to differ.
Step 2: Update the SCSS/Sass configuration
In Mehdi’s guid, there’s one part where you would add the following to main.scss:
---
---

@import "tailwindcss/base";
@import "tailwindcss/components";
@import "tailwindcss/utilities";
If, however, you then try to run bundle exec jekyll serve, you’ll likely run into this error message:
Conversion error: Jekyll::Converters::Scss encountered an error while converting 'assets/css/main.scss':
Error: Function rgb is missing argument $green. on line [blahblah other stuff]
That’s because Jekyll’s own SCSS/Sass plugin, Jekyll Sass Converter, needs to switch to a newer implementation of Sass3, in order to support the latest changes in Tailwind starting with v3.0. In addition, due to Tailwind CSS 3.0’s JIT engine, you’ll need to disable caching on Jekyll’s PostCSS plugin, to ensure you get the freshest CSS4.
Even if you don’t run into this error somehow, you should still keep things current.
Add the following to your _config.yml:
sass:
  implementation: sass-embedded # Use the latest Sass implementation

postcss:
  cache: false # Regenerate CSS all the time for compatibility with Tailwind JIT
Now, you can add some test HTML to default.html like so:
<div class="text-center text-2xl">Hello World!</div>
Run bundle exec jekyll serve, and the site should work on http://localhost:4000! Add a few test posts and pages to make sure everything works fine.
Step 3: Exclude certain files/folders from your Git repository
To reduce bulk in your Git repository, add to your .gitignore file the following:
.jekyll-cache
.jekyll-metadata
_site

node_modules

.DS_Store
The first three lines are generated by Jekyll, and don’t need to be part of your Git repository. They will be generated as needed when deploying the site to your Github Page.
node_modules shouldn’t be part of your repository, since it gets quite massive. Node modules will be installed as part of the build and deploy process.
Step 4: Set up a workflow to get your site on Github Pages
Speaking of build and deploy, you’ll be creating a custom Github Action to build and deploy your site to Github Pages. This is because a custom action lets you install any gem and plugin for Github Pages, including custom Jekyll versions, the latest Ruby version, etc.
Github now supports deploying to Github Pages with a custom workflow, without the need to specify a publishing source5.This is still in beta, but it does simplify things quite a bit!
On your repository’s page in Github, click on “Settings”, then in the sidebar, click “Pages”.

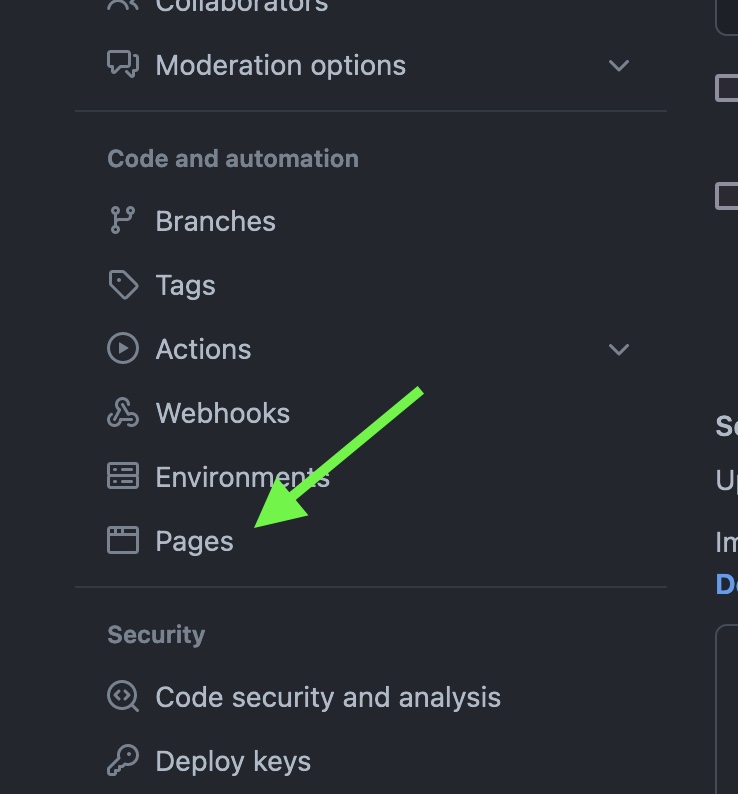
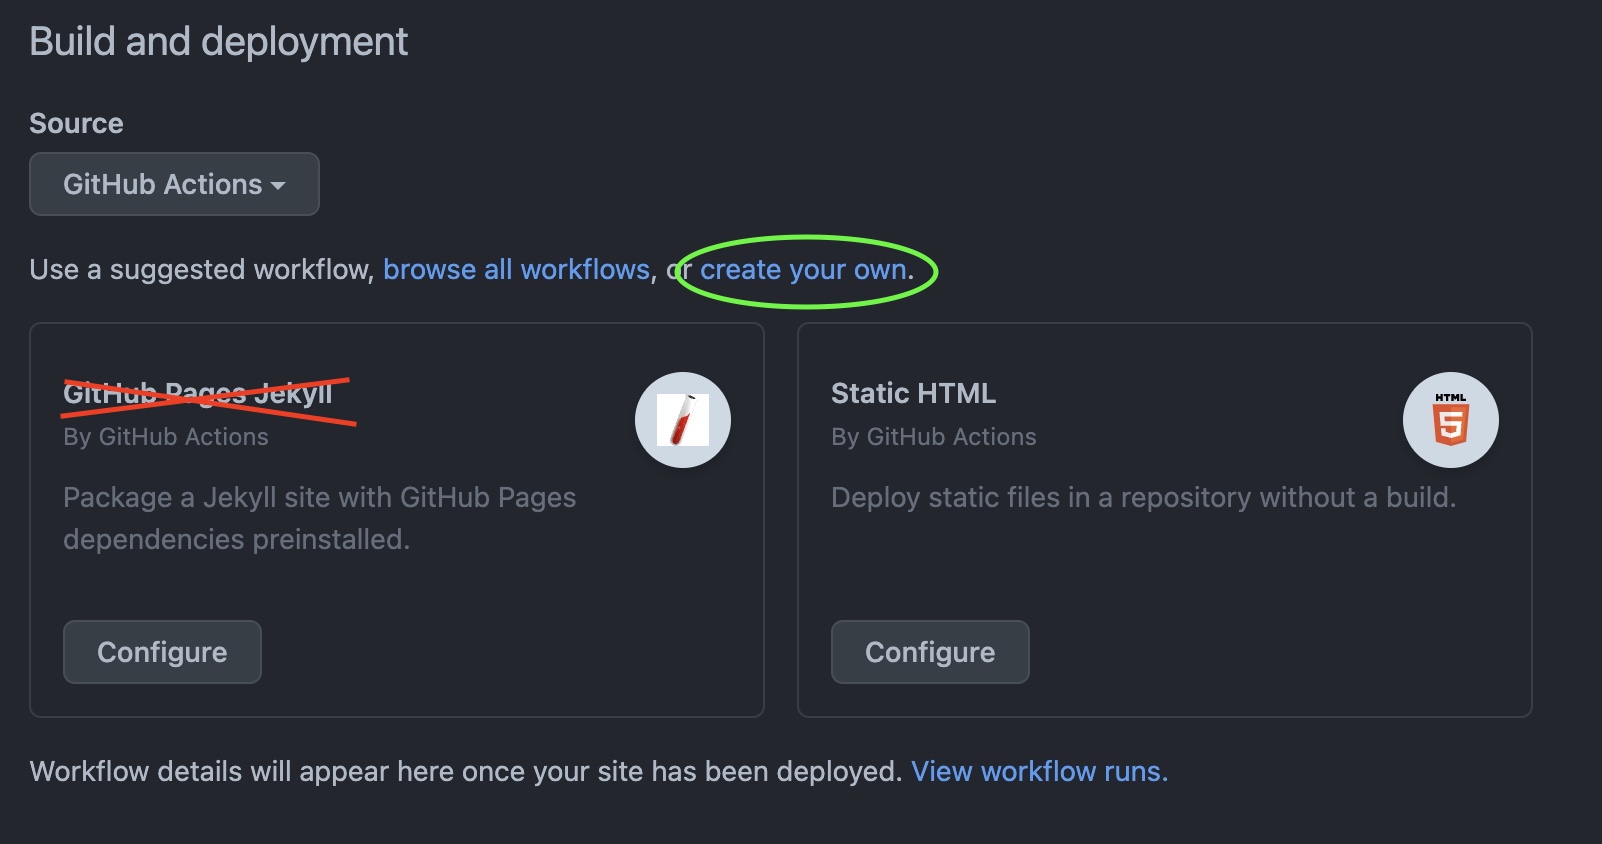
In the “Build and deployment” section, change “Source” to “Github Actions (beta)”. You’ll then see suggested workflows to use, one of which is likely the “Github Pages Jekyll” workflow. Don’t use this. Instead, select “create your own”.
Next comes the editor for the new workflow file. You can name this however you wish, just make sure it has .yml at the end. Navigate to the plain Jekyll starter workflow, and copy the file’s contents into the workspace. The contents should look like this:
# Sample workflow for building and deploying a Jekyll site to GitHub Pages
name: Deploy Jekyll site to Pages

on:
  # Runs on pushes targeting the default branch
  push:
    branches: [$default-branch]

  # Allows you to run this workflow manually from the Actions tab
  workflow_dispatch:

# Sets permissions of the GITHUB_TOKEN to allow deployment to GitHub Pages
permissions:
  contents: read
  pages: write
  id-token: write

# Allow one concurrent deployment
concurrency:
  group: "pages"
  cancel-in-progress: true

jobs:
  # Build job
  build:
    runs-on: ubuntu-latest
    steps:
      - name: Checkout
        uses: actions/checkout@v3
      - name: Setup Ruby
        uses: ruby/setup-ruby@v1
        with:
          ruby-version: '3.0' # Not needed with a .ruby-version file
          bundler-cache: true # runs 'bundle install' and caches installed gems automatically
          cache-version: 0 # Increment this number if you need to re-download cached gems
      - name: Setup Pages
        id: pages
        uses: actions/configure-pages@v1
      - run: bundle exec jekyll build --baseurl $ # defaults output to '/_site'
      - name: Upload artifact
        uses: actions/upload-pages-artifact@v1 # This will automatically upload an artifact from the '/_site' directory

  # Deployment job
  deploy:
    environment:
      name: github-pages
      url: $
    runs-on: ubuntu-latest
    needs: build
    steps:
      - name: Deploy to GitHub Pages
        id: deployment
        uses: actions/deploy-pages@v1
You’ll need a few more edits to really get things going:
- You might need to explicitly state the branch that the workflow should run on.
$default-branchdoesn't seem to do anything for me, so I hard-coded the name of my default branch, which is justmain. - Optional: The Ruby version is set to 3.0 but I personally like to use the latest, which is 3.1.2 at time of writing. You can change versions with the `ruby-version` param. Make sure it's at least 2.7!
- Get Node modules installed so you have access to Tailwind CSS and its magic. Under the
Setup Rubysection, add the following:- name: Install Dependencies run: npm install
-
Replace
- run: bundle exec jekyll build --baseurl $
to- run: JEKYLL_ENV=production bundle exec jekyll build --baseurl $
See this post for the reason why.
Step 5: Deploy!
Push this new file to your repository. With luck, the workflow will kick off, and you can now view your Github Page!